Google Sheets Mail Merge : Advanced
22-February-2019Google Script for Mail Merge
Introduction
Last year, during Christmas, I was looking out for an easy to use script to send out Personalised e-Cards using the power of Google. But unfortunately I could not find a readily available solution. A few solutions were available but they were not free or not ready-to-use.
So I just looked at the Google Help section where I found an example which was meeting around 90% of the requirement and then a little bit of browsing Stackoverflow and I was good to go.
I am sharing this Ready to Use Google Sheet with the script on web with the hope that it helps someone save time while doing Mail Merge.
What this script does?
This script will read the email ids and the form of Address (Mr./Ms Firstname etc) and then create a personalised email with the predefined subject and body and then insert an image(a Christmas card in my case) and then send out the email. The script picks the image to be embedded from the user’s Google Drive. After the mail is sent successfully, it will update the status column in the sheet with the words ‘EMAIL_SENT’. This is important as Google limits the number of email which free accounts can send(using scripts) to 100 per day.
So if you have 300 email ids in your list, then you have to break it into 3 parts. The code is written in such a way that based on the Status it will skip all those email ids which have already been sent the Greeting Email. So effectively we can schedule this script to run at a fixed time everyday from 22nd Dec to 24th Dec. Everyday it will fire 100 emails and then stop. It will continue this way till the 3rd day(i.e., 24th Dec) by when it would have sent out emails to your complete list.
Requirements for this mail merge to function
- An existing Gmail id
- Google sheet with your contact’s email id and Form of address(Mr. Kent or Mr. Clarke Kent)
- Greeting Image(upload it to your Google Drive)
- Content of the email(subject and body)
You can download the ready to use Google Sheet with the code in it by clicking on the link below. Please login to your personal Gmail ID before clicking on the link below.
https://docs.google.com/spreadsheets/d/14zdcYdM7iBF_YTV7n6NGj7CTYuCMrcTBsa1yqYL3amU/edit?usp=sharing
Steps to copy the template sheet (along with code ) to your Google Drive
First you have to Login to your Gmail ID and then click on the link given above.
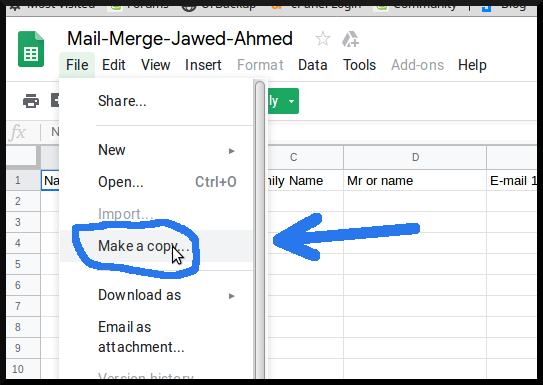
Once the sheet has opened, please click on File–> Make a copy.. You won’t be able to make a copy if you are not logged in to your personal Gmail ID.
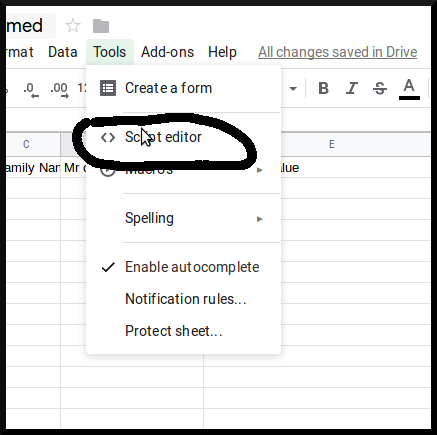
Then you need to open the Script Editor by clicking on Tools –> Script Editor
Here you need to find the ID of this particular Google Sheet. For this we have to give a few authorizations first.
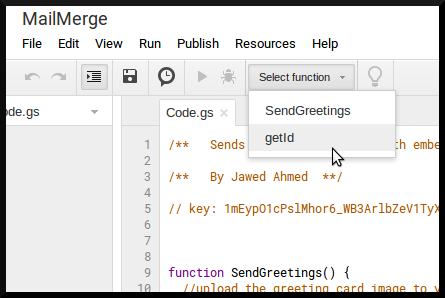
Run the function called ‘GetID’.
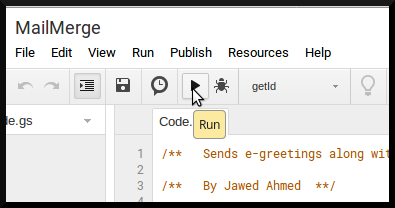
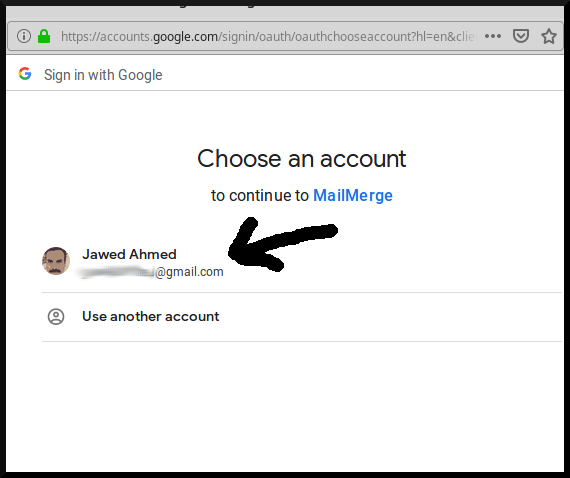
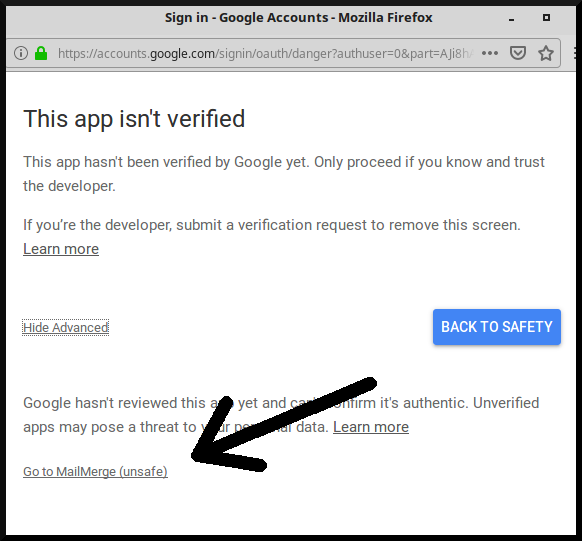
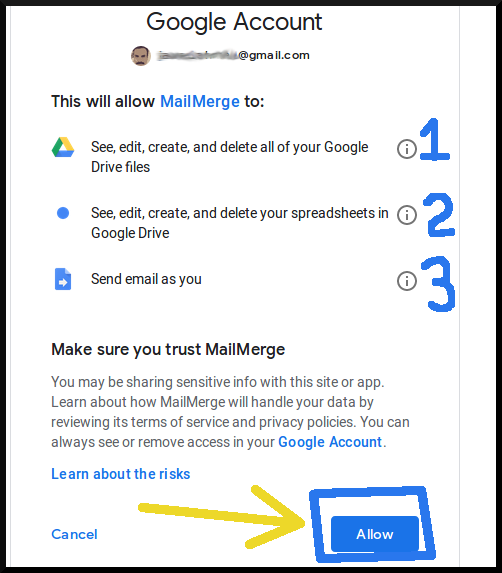
At this stage you will be prompted to Authorize the script.
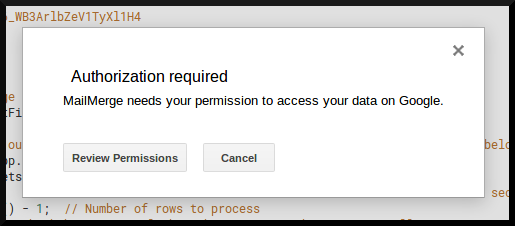
After you have given the authorisation, please run the GetID script again and then <IMPORTANT>go to the Browser TAB where you have the Google Sheet Open. </IMPORTANT>In this sheet, a popup will be generated with the Sheet ID.

Please copy this string and paste it into the Script at the top where its mentioned.
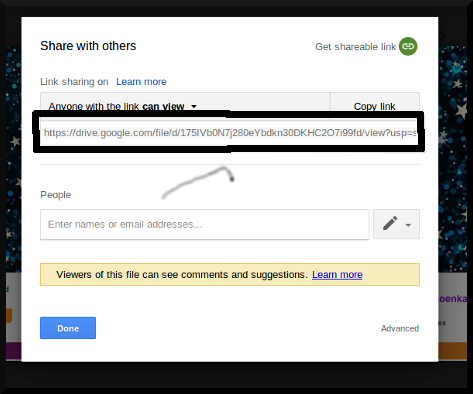
To insert the image into the email using the script, you will also need to find the Image ID of that image. It can be done by opening the image in Google Drive and clicking on the Share link. In the next screen which opens, please copy the string between the slashes after ‘d’ and before ‘view’.
Pre-flight Checklist
Check that you have changed the following things in the script.
- Google Sheet ID
- Google Drive Image ID
- Your name in the from email id
- Your email id
- Your name in the body of the greeting email
Once you are done you can check by entering any of your own alternative email id to the Google Sheet and running the SendGreetings script in the same way that you ran the GetID script. If it works properly then you can paste the rest of the email ids to the Sheet and run the script. If you have more than 100 contact names then you can run the script once every day till you are done or you can even schedule it using Googe Script Triggers.
I am also sharing the Google Script(see below). But you don’t need to download it separately if you have already made a copy of the Google Sheet to your Google Drive. As the code is included within the Google Sheet which you can access via Script Editor.
/**   Sends e-greetings along with embedded image to the contact list  **/

/**   By Jawed Ahmed  **/

// key: 1mEypO1c3xxxxxxxxxxxxxxxxXl1H4


function SendGreetings() {
  //upload the greeting card image to your google drive and then enter the image id in the line below
var GreetingBlob =   DriveApp.getFileById('ENTER THE IMAGE ID HERE');

//use the function getID to find out the google sheet ID of your google Sheet. It *NEEDS* to be pasted below
  var spreadsheet = SpreadsheetApp.openById('Enter Google Sheet ID here');
  var sheet = spreadsheet.getSheets()[0];
  var startRow = 2;                            // First row of data contains header so start from the second row
  var numRows = sheet.getLastRow() - 1;  // Number of rows to process
  var dailylimit = 0; //counter to check how many mails have been sent in this process till now
  var lastColumn = sheet.getLastColumn();      // Last column
  var dataRange = sheet.getRange(startRow, 1, numRows, lastColumn) // Fetch the data range of the active sheet
var data = dataRange.getValues(); // Fetch values for each row in the range
var EMAIL_SENT = "EMAIL SENT";
  for (var i = 0; i < data.length; ++i) {
    var row = data[i];
    // Assign each row a variable
    var contactName = row[3];                // Col D: Contact name or address
    var contactEmail = row[4];               // Col E: Contact email
    var emailStatus = row[lastColumn - 1]; // Col E: Email Status

   if (emailStatus !== EMAIL_SENT && contactEmail && dailylimit<100 ) {


          var emailBody =  '<p>Dear ' + contactName + ',<p>';
          emailBody += '<p>Wishing you and your family a great new year 2019.May all your wishes be fulfilled and may you achieve all that you are wishing for !<p>';
          emailBody += '<br>Warm regards<br><YOUR OWN NAME><br>';  //Please mention your name here
     emailBody += '<img src=cid:GreetingImage>';
          emailBody += '<p><email signature, name, contact number, place name etc></p>';
     MailApp.sendEmail({ to: contactEmail, // recipient
                              subject: "Seasons Greetings!", // This is the email subject
                              htmlBody: emailBody, // body
                        name: 'YOUR NAME',    // Enter your name
                        replyTo: 'YOUR EMAIL ID',  // Enter your email
                        inlineImages: {GreetingImage: GreetingBlob}}
                              );
               sheet.getRange(startRow + i, lastColumn).setValue(EMAIL_SENT); // Update the last column with "EMAIL_SENT"
               SpreadsheetApp.flush(); // Make sure the last cell is updated right away
     Utilities.sleep(200);

     dailylimit = dailylimit + 1;

        }

  }
}


function getId() {
  Browser.msgBox('Spreadsheet key: ' + SpreadsheetApp.getActiveSpreadsheet().getId());
}